> ## Documentation Index
> Fetch the complete documentation index at: https://docs.digifist.com/llms.txt
> Use this file to discover all available pages before exploring further.
# Create your first campaign
> A full walkthrough of the 3-step campaign wizard using the Percentage Discount template — from template pick to a live discount at checkout.
Every campaign in Galantis Discount Flow is created in the same 3-step wizard: pick a starting point, shape the logic in the Rule Builder, then schedule and publish. This guide walks the whole wizard end to end using the **Percentage Discount** template — the simplest of the 6 starter templates and the fastest way to see a real discount at checkout.
The wizard's footer keeps you oriented throughout: **Next** moves you forward, **Back** returns to the previous step, and the final step offers **Save as draft** or **Create Campaign**.
## Before you start
Open **Campaigns** in the app navigation and click the button to create a new campaign. You'll land on step 1 of the wizard.
On the **Free plan** you can have up to **3 active campaigns** at a time. Drafts don't count against this limit, so you can prepare as many campaigns as you like and activate them as slots free up — or upgrade to Pro for unlimited campaigns via **Settings → Change plan**.
## The 3-step wizard
Step 1 shows the template gallery with 6 starter templates — **Percentage Discount**, **Free Shipping**, **Buy 1 Get 1 Free**, **Fixed Amount Discount**, **End of Season**, and **Loyal Customer Reward** — plus a **Start from scratch** tile for a blank canvas.
Select **Percentage Discount**. The wizard pre-fills the campaign name and loads a ready-made flow into the Rule Builder, then moves you to step 2. You can change your mind later with **Change template**.
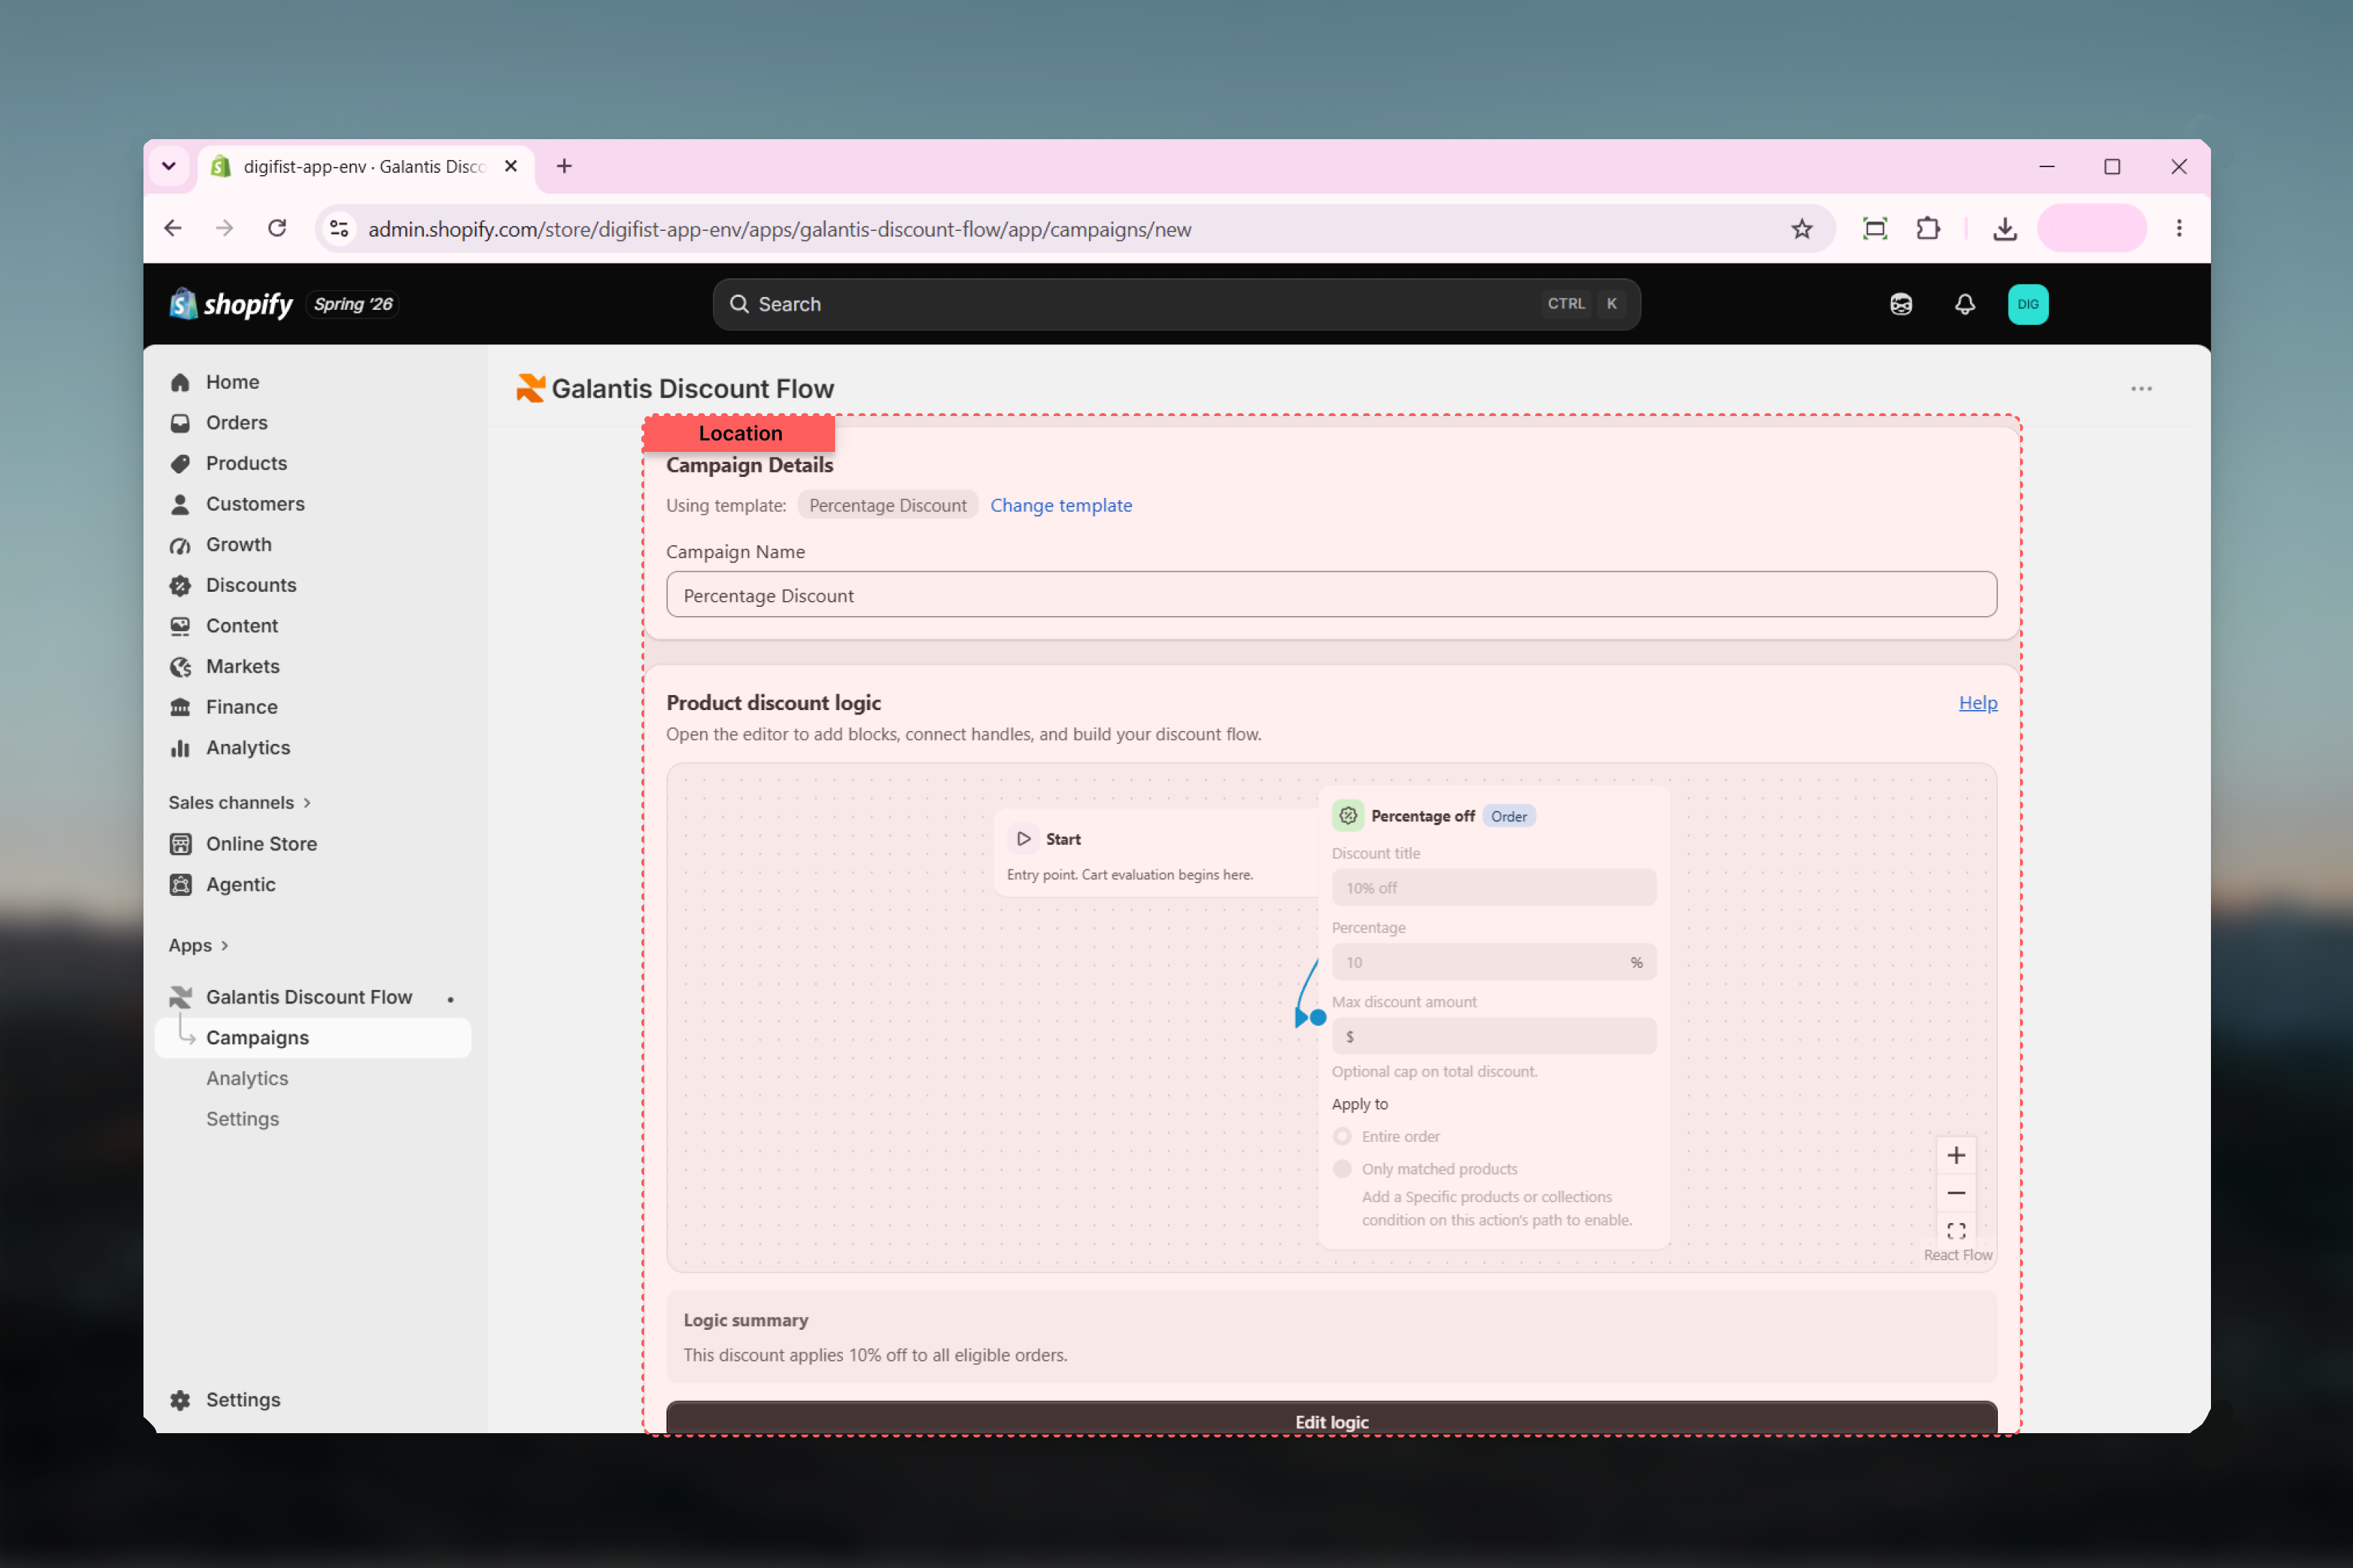
Step 2 is where the campaign takes shape:
* **Campaign Name** — pre-filled from the template; rename it to something you'll recognize in lists and analytics, like "Summer 10% off".
* **Rule Builder** — the visual canvas. The Percentage Discount template gives you a minimal flow ending in a **Percentage off** action. Open the action node to set the **Discount title** (what customers see) and the **Percentage**.
Want the discount to be conditional? Add condition nodes such as **Cart total** or **Customer tag**, combine them with **AND**/**OR**/**NOT** gates, and wire them into the flow. For your first campaign, the template's defaults are enough — click **Next**.
 Step 3 handles scheduling and stacking:
* **Active dates** — pick a **Start date**, and optionally toggle **Set end date** for a fixed end. Times use your store timezone. A campaign with no end date runs until you deactivate it.
* **Combinations** — choose which Shopify discount classes this campaign can combine with: order, product, and shipping discounts. This mirrors Shopify's native combination rules.
Finish with one of the two footer buttons:
* **Create Campaign** — publishes the flow to Shopify as a real discount. It becomes active according to its start date.
* **Save as draft** — stores the campaign without publishing, so you can come back and finish it later. Drafts don't count toward the Free plan's active-campaign limit.
## Where your campaign appears
After publishing, the campaign shows up in two places:
| Location | What you'll see |
| -------------------------------------------- | ------------------------------------------------------------------------------------------------- |
| **Campaigns** list in Galantis Discount Flow | The campaign with its status, where you can edit, deactivate, or review it. |
| **Shopify's native Discounts page** | The published discount as a real Shopify discount — proof that nothing lives only inside the app. |
Because your Percentage Discount flow contains no **Discount code** condition, it publishes as an **automatic discount** — customers get it at checkout with no code to type. Add a **Discount code** condition and the campaign becomes a code-based discount instead.
Shopify allows a maximum of **25 active automatic discounts per store**. Code-based campaigns don't count toward this Shopify limit, so heavy users often mix both types.
## Related guides
* [Storefront setup](/galantis/discount/getting-started/storefront-setup)
* [Rule Builder overview](/galantis/discount/rule-builder/index)
* [Campaign templates](/galantis/discount/campaigns/templates)
* [Analytics](/galantis/discount/analytics/index)
Step 3 handles scheduling and stacking:
* **Active dates** — pick a **Start date**, and optionally toggle **Set end date** for a fixed end. Times use your store timezone. A campaign with no end date runs until you deactivate it.
* **Combinations** — choose which Shopify discount classes this campaign can combine with: order, product, and shipping discounts. This mirrors Shopify's native combination rules.
Finish with one of the two footer buttons:
* **Create Campaign** — publishes the flow to Shopify as a real discount. It becomes active according to its start date.
* **Save as draft** — stores the campaign without publishing, so you can come back and finish it later. Drafts don't count toward the Free plan's active-campaign limit.
## Where your campaign appears
After publishing, the campaign shows up in two places:
| Location | What you'll see |
| -------------------------------------------- | ------------------------------------------------------------------------------------------------- |
| **Campaigns** list in Galantis Discount Flow | The campaign with its status, where you can edit, deactivate, or review it. |
| **Shopify's native Discounts page** | The published discount as a real Shopify discount — proof that nothing lives only inside the app. |
Because your Percentage Discount flow contains no **Discount code** condition, it publishes as an **automatic discount** — customers get it at checkout with no code to type. Add a **Discount code** condition and the campaign becomes a code-based discount instead.
Shopify allows a maximum of **25 active automatic discounts per store**. Code-based campaigns don't count toward this Shopify limit, so heavy users often mix both types.
## Related guides
* [Storefront setup](/galantis/discount/getting-started/storefront-setup)
* [Rule Builder overview](/galantis/discount/rule-builder/index)
* [Campaign templates](/galantis/discount/campaigns/templates)
* [Analytics](/galantis/discount/analytics/index)