

Before you start
Open Campaigns in the app navigation and click the button to create a new campaign. You’ll land on step 1 of the wizard.On the Free plan you can have up to 3 active campaigns at a time. Drafts don’t count against this limit, so you can prepare as many campaigns as you like and activate them as slots free up — or upgrade to Pro for unlimited campaigns via Settings → Change plan.
The 3-step wizard
1
Choose a template
Step 1 shows the template gallery with 6 starter templates — Percentage Discount, Free Shipping, Buy 1 Get 1 Free, Fixed Amount Discount, End of Season, and Loyal Customer Reward — plus a Start from scratch tile for a blank canvas.Select Percentage Discount. The wizard pre-fills the campaign name and loads a ready-made flow into the Rule Builder, then moves you to step 2. You can change your mind later with Change template.
2
Name the campaign and shape the rules
Step 2 is where the campaign takes shape: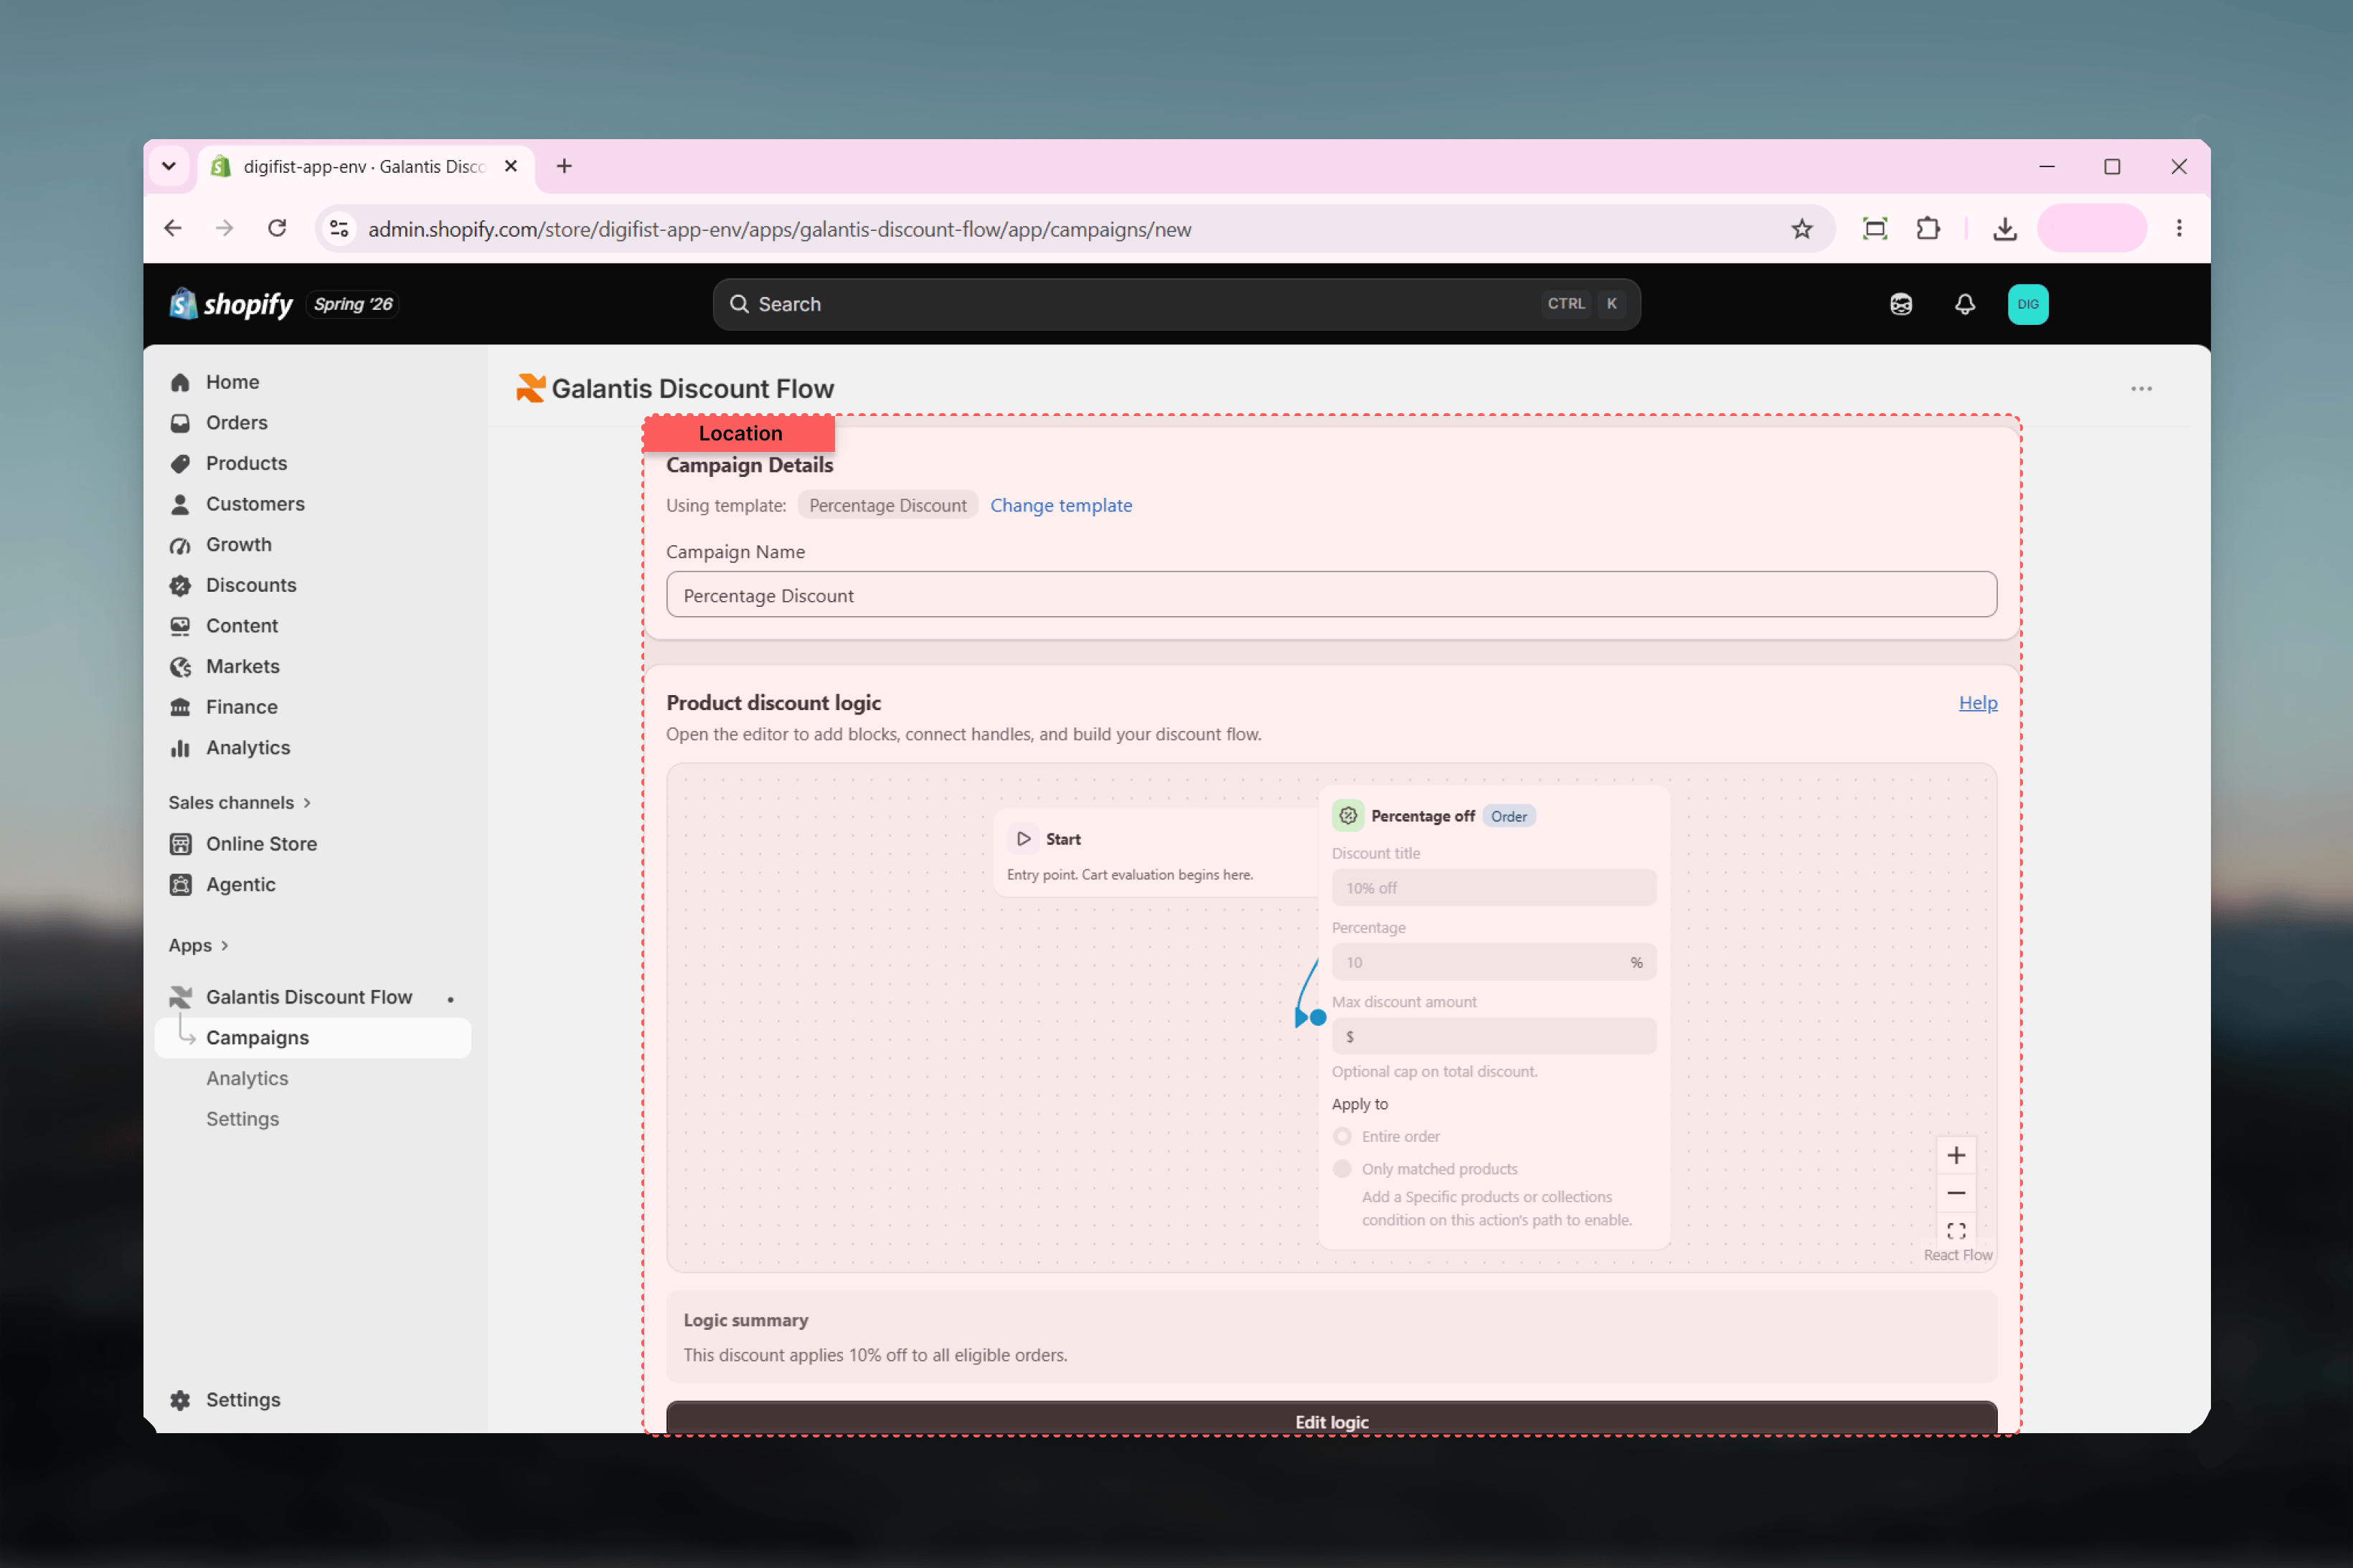
- Campaign Name — pre-filled from the template; rename it to something you’ll recognize in lists and analytics, like “Summer 10% off”.
- Rule Builder — the visual canvas. The Percentage Discount template gives you a minimal flow ending in a Percentage off action. Open the action node to set the Discount title (what customers see) and the Percentage.
3
Set active dates and combinations
Step 3 handles scheduling and stacking:
- Active dates — pick a Start date, and optionally toggle Set end date for a fixed end. Times use your store timezone. A campaign with no end date runs until you deactivate it.
- Combinations — choose which Shopify discount classes this campaign can combine with: order, product, and shipping discounts. This mirrors Shopify’s native combination rules.
4
Publish — or save for later
Finish with one of the two footer buttons:
- Create Campaign — publishes the flow to Shopify as a real discount. It becomes active according to its start date.
- Save as draft — stores the campaign without publishing, so you can come back and finish it later. Drafts don’t count toward the Free plan’s active-campaign limit.
Where your campaign appears
After publishing, the campaign shows up in two places:
Because your Percentage Discount flow contains no Discount code condition, it publishes as an automatic discount — customers get it at checkout with no code to type. Add a Discount code condition and the campaign becomes a code-based discount instead.